Proxy Design Pattern

definition

Provide a surrogate or placeholder for another object to control access to it.


UML class diagram


participants

    The classes and/or objects participating in this pattern are:

  • Proxy   (MathProxy)

    • maintains a reference that lets the proxy access the real subject. Proxy may refer to a Subject if the RealSubject and Subject interfaces are the same.
    • provides an interface identical to Subject’s so that a proxy can be substituted for for the real subject.
    • controls access to the real subject and may be responsible for creating and deleting it.
    • other responsibilites depend on the kind of proxy:
      • remote proxies are responsible for encoding a request and its arguments and for sending the encoded request to the real subject in a different address space.
      • virtual proxies may cache additional information about the real subject so that they can postpone accessing it. For example, the ImageProxy from the Motivation caches the real images’s extent.
      • protection proxies check that the caller has the access permissions required to perform a request.
  • Subject   (IMath)

    • defines the common interface for RealSubject and Proxy so that a Proxy can be used anywhere a RealSubject is expected.
  • RealSubject   (Math)

    • defines the real object that the proxy represents.


sample code in C#

This structural code demonstrates the Proxy pattern which provides a representative object (proxy) that controls access to another similar object.


// Proxy pattern — Structural example

using System;


namespace DoFactory.GangOfFour.Proxy.Structural

{

  ///
<summary>

  /// MainApp startup class for Structural

  /// Proxy Design Pattern.

  ///
</summary>

  class
MainApp

  {

    ///
<summary>

    /// Entry point into console application.

    ///
</summary>

    static
void Main()

    {

      // Create proxy and request a service

      Proxy proxy = new
Proxy();

      proxy.Request();


      // Wait for user

      Console.ReadKey();

    }

  }


  ///
<summary>

  /// The ‘Subject’ abstract class

  ///
</summary>

  abstract
class
Subject

  {

    public
abstract
void Request();

  }


  ///
<summary>

  /// The ‘RealSubject’ class

  ///
</summary>

  class
RealSubject : Subject

  {

    public
override
void Request()

    {

      Console.WriteLine(“Called RealSubject.Request()”);

    }

  }


  ///
<summary>

  /// The ‘Proxy’ class

  ///
</summary>

  class
Proxy : Subject

  {

    private
RealSubject _realSubject;


    public
override
void Request()

    {

      // Use ‘lazy initialization’

      if (_realSubject == null)

      {

        _realSubject = new
RealSubject();

      }


      _realSubject.Request();

    }

  }

}

Output

Called RealSubject.Request()


This real-world code demonstrates the Proxy pattern for a Math object represented by a MathProxy object.


// Proxy pattern — Real World example

using System;


namespace DoFactory.GangOfFour.Proxy.RealWorld

{

  ///
<summary>

  /// MainApp startup class for Real-World

  /// Proxy Design Pattern.

  ///
</summary>

  class
MainApp

  {

    ///
<summary>

    /// Entry point into console application.

    ///
</summary>

    static
void Main()

    {

      // Create math proxy

      MathProxy proxy = new
MathProxy();


      // Do the math

      Console.WriteLine(“4 + 2 = “ + proxy.Add(4, 2));

      Console.WriteLine(“4 – 2 = “ + proxy.Sub(4, 2));

      Console.WriteLine(“4 * 2 = “ + proxy.Mul(4, 2));

      Console.WriteLine(“4 / 2 = “ + proxy.Div(4, 2));


      // Wait for user

      Console.ReadKey();

    }

  }


  ///
<summary>

  /// The ‘Subject interface

  ///
</summary>

  public
interface
IMath

  {

    double Add(double x, double y);

    double Sub(double x, double y);

    double Mul(double x, double y);

    double Div(double x, double y);

  }


  ///
<summary>

  /// The ‘RealSubject’ class

  ///
</summary>

  class
Math : IMath

  {

    public
double Add(double x, double y) { return x + y; }

    public
double Sub(double x, double y) { return x – y; }

    public
double Mul(double x, double y) { return x * y; }

    public
double Div(double x, double y) { return x / y; }

  }


  ///
<summary>

  /// The ‘Proxy Object’ class

  ///
</summary>

  class
MathProxy : IMath

  {

    private
Math _math = new
Math();


    public
double Add(double x, double y)

    {

      return _math.Add(x, y);

    }

    public
double Sub(double x, double y)

    {

      return _math.Sub(x, y);

    }

    public
double Mul(double x, double y)

    {

      return _math.Mul(x, y);

    }

    public
double Div(double x, double y)

    {

      return _math.Div(x, y);

    }

  }

}

Output

4 + 2 = 6

4 – 2 = 2

4 * 2 = 8

4 / 2 = 2


Chain of Responsibility Design Pattern

definition

Avoid coupling the sender of a request to its receiver by giving more than one object a chance to handle the request. Chain the receiving objects and pass the request along the chain until an object handles it.


UML class diagram


participants

    The classes and/or objects participating in this pattern are:

  • Handler   (Approver)

    • defines an interface for handling the requests
    • (optional) implements the successor link
  • ConcreteHandler   (Director, VicePresident, President)

    • handles requests it is responsible for
    • can access its successor
    • if the ConcreteHandler can handle the request, it does so; otherwise it forwards the request to its successor
  • Client   (ChainApp)

    • initiates the request to a ConcreteHandler object on the chain


sample code in C#

This structural code demonstrates the Chain of Responsibility pattern in which several linked objects (the Chain) are offered the opportunity to respond to a request or hand it off to the object next in line.


// Chain of Responsibility pattern — Structural example

using System;


namespace DoFactory.GangOfFour.Chain.Structural

{

  ///
<summary>

  /// MainApp startup class for Structural

  /// Chain of Responsibility Design Pattern.

  ///
</summary>

  class
MainApp

  {

    ///
<summary>

    /// Entry point into console application.

    ///
</summary>

    static
void Main()

    {

      // Setup Chain of Responsibility

      Handler h1 = new
ConcreteHandler1();

      Handler h2 = new
ConcreteHandler2();

      Handler h3 = new
ConcreteHandler3();

      h1.SetSuccessor(h2);

      h2.SetSuccessor(h3);


      // Generate and process request

      int[] requests = { 2, 5, 14, 22, 18, 3, 27, 20 };


      foreach (int request in requests)

      {

        h1.HandleRequest(request);

      }


      // Wait for user

      Console.ReadKey();

    }

  }


  ///
<summary>

  /// The ‘Handler’ abstract class

  ///
</summary>

  abstract
class
Handler

  {

    protected
Handler successor;


    public
void SetSuccessor(Handler successor)

    {

      this.successor = successor;

    }


    public
abstract
void HandleRequest(int request);

  }


  ///
<summary>

  /// The ‘ConcreteHandler1’ class

  ///
</summary>

  class
ConcreteHandler1 : Handler

  {

    public
override
void HandleRequest(int request)

    {

      if (request >= 0 && request < 10)

      {

        Console.WriteLine(“{0} handled request {1}”,

          this.GetType().Name, request);

      }

      else
if (successor != null)

      {

        successor.HandleRequest(request);

      }

    }

  }


  ///
<summary>

  /// The ‘ConcreteHandler2’ class

  ///
</summary>

  class
ConcreteHandler2 : Handler

  {

    public
override
void HandleRequest(int request)

    {

      if (request >= 10 && request < 20)

      {

        Console.WriteLine(“{0} handled request {1}”,

          this.GetType().Name, request);

      }

      else
if (successor != null)

      {

        successor.HandleRequest(request);

      }

    }

  }


  ///
<summary>

  /// The ‘ConcreteHandler3’ class

  ///
</summary>

  class
ConcreteHandler3 : Handler

  {

    public
override
void HandleRequest(int request)

    {

      if (request >= 20 && request < 30)

      {

        Console.WriteLine(“{0} handled request {1}”,

          this.GetType().Name, request);

      }

      else
if (successor != null)

      {

        successor.HandleRequest(request);

      }

    }

  }

}

Output

ConcreteHandler1 handled request 2

ConcreteHandler1 handled request 5

ConcreteHandler2 handled request 14

ConcreteHandler3 handled request 22

ConcreteHandler2 handled request 18

ConcreteHandler1 handled request 3

ConcreteHandler3 handled request 27

ConcreteHandler3 handled request 20


This real-world code demonstrates the Chain of Responsibility pattern in which several linked managers and executives can respond to a purchase request or hand it off to a superior. Each position has can have its own set of rules which orders they can approve.


// Chain of Responsibility pattern — Real World example

using System;


namespace DoFactory.GangOfFour.Chain.RealWorld

{

  ///
<summary>

  /// MainApp startup class for Real-World

  /// Chain of Responsibility Design Pattern.

  ///
</summary>

  class
MainApp

  {

    ///
<summary>

    /// Entry point into console application.

    ///
</summary>

    static
void Main()

    {

      // Setup Chain of Responsibility

      Approver larry = new
Director();

      Approver sam = new
VicePresident();

      Approver tammy = new
President();


      larry.SetSuccessor(sam);

      sam.SetSuccessor(tammy);


      // Generate and process purchase requests

      Purchase p = new
Purchase(2034, 350.00, “Assets”);

      larry.ProcessRequest(p);


      p = new
Purchase(2035, 32590.10, “Project X”);

      larry.ProcessRequest(p);


      p = new
Purchase(2036, 122100.00, “Project Y”);

      larry.ProcessRequest(p);


      // Wait for user

      Console.ReadKey();

    }

  }


  ///
<summary>

  /// The ‘Handler’ abstract class

  ///
</summary>

  abstract
class
Approver

  {

    protected
Approver successor;


    public
void SetSuccessor(Approver successor)

    {

      this.successor = successor;

    }


    public
abstract
void ProcessRequest(Purchase purchase);

  }


  ///
<summary>

  /// The ‘ConcreteHandler’ class

  ///
</summary>

  class
Director : Approver

  {

    public
override
void ProcessRequest(Purchase purchase)

    {

      if (purchase.Amount < 10000.0)

      {

        Console.WriteLine(“{0} approved request# {1}”,

          this.GetType().Name, purchase.Number);

      }

      else
if (successor != null)

      {

        successor.ProcessRequest(purchase);

      }

    }

  }


  ///
<summary>

  /// The ‘ConcreteHandler’ class

  ///
</summary>

  class
VicePresident : Approver

  {

    public
override
void ProcessRequest(Purchase purchase)

    {

      if (purchase.Amount < 25000.0)

      {

        Console.WriteLine(“{0} approved request# {1}”,

          this.GetType().Name, purchase.Number);

      }

      else
if (successor != null)

      {

        successor.ProcessRequest(purchase);

      }

    }

  }


  ///
<summary>

  /// The ‘ConcreteHandler’ class

  ///
</summary>

  class
President : Approver

  {

    public
override
void ProcessRequest(Purchase purchase)

    {

      if (purchase.Amount < 100000.0)

      {

        Console.WriteLine(“{0} approved request# {1}”,

          this.GetType().Name, purchase.Number);

      }

      else

      {

        Console.WriteLine(

          “Request# {0} requires an executive meeting!”,

          purchase.Number);

      }

    }

  }


  ///
<summary>

  /// Class holding request details

  ///
</summary>

  class
Purchase

  {

    private
int _number;

    private
double _amount;

    private
string _purpose;


    // Constructor

    public Purchase(int number, double amount, string purpose)

    {

      this._number = number;

      this._amount = amount;

      this._purpose = purpose;

    }


    // Gets or sets purchase number

    public
int Number

    {

      get { return _number; }

      set { _number = value; }

    }


    // Gets or sets purchase amount

    public
double Amount

    {

      get { return _amount; }

      set { _amount = value; }

    }


    // Gets or sets purchase purpose

    public
string Purpose

    {

      get { return _purpose; }

      set { _purpose = value; }

    }

  }

}

Output

Director Larry approved request# 2034

President Tammy approved request# 2035

Request# 2036 requires an executive meeting!


Introduction to Generics

Generic classes and methods combine reusability, type safety and efficiency in a way that their non-generic counterparts cannot. Generics are most frequently used with collections and the methods that operate on them. Version 2.0 of the .NET Framework class library provides a new namespace, System.Collections.Generic, which contains several new generic-based collection classes. It is recommended that all applications that target the .NET Framework 2.0 and later use the new generic collection classes instead of the older non-generic counterparts such as ArrayList. For more information, see Generics in the .NET Framework Class Library (C# Programming Guide).

Of course, you can also create custom generic types and methods to provide your own generalized solutions and design patterns that are type-safe and efficient. The following code example shows a simple generic linked-list class for demonstration purposes. (In most cases, you should use the List(Of T) class provided by the .NET Framework class library instead of creating your own.) The type parameter T is used in several locations where a concrete type would ordinarily be used to indicate the type of the item stored in the list. It is used in the following ways:

  • As the type of a method parameter in the AddHead method.
  • As the return type of the public method GetNext and the Data property in the nested Node class.
  • As the type of the private member data in the nested class.

Note that T is available to the nested Node class. When GenericList<T> is instantiated with a concrete type, for example as a GenericList<int>, each occurrence of T will be replaced with int.

C#


// type parameter T in angle brackets
public
class GenericList<T>
{
// The nested class is also generic on T.
private
class Node
{
// T used in non-generic constructor.
public Node(T t)
{
next =
null;
data = t;
}

private Node next;
public Node Next
{
get { return next; }
set { next = value; }
}

// T as private member data type.
private T data;

// T as return type of property.
public T Data
{
get { return data; }
set { data = value; }
}
}

private Node head;

// constructor
public GenericList()
{
head =
null;
}

// T as method parameter type:
public
void AddHead(T t)
{
Node n =
new Node(t);
n.Next = head;
head = n;
}

public IEnumerator<T> GetEnumerator()
{
Node current = head;

while (current != null)
{
yield
return current.Data;
current = current.Next;
}
}
}

The following code example shows how client code uses the generic GenericList<T> class to create a list of integers. Simply by changing the type argument, the following code could easily be modified to create lists of strings or any other custom type:

C#


class TestGenericList
{
static
void Main()
{
// int is the type argument
GenericList<
int> list = new GenericList<int>();

for (int x = 0; x < 10; x++)
{
list.AddHead(x);
}

foreach (int i in list)
{
System.Console.Write(i +
” “);
}
System.Console.WriteLine(
“\nDone”);
}
}

Working with MSMQ Triggers

Introduction

In a world of enterprise applications built on Microsoft technology, MSMQ has been the solution for effective messaging. MSMQ has been one of the most powerful methods for distributed applications to talk with each other in a connectionless and asynchronous manner. But using MSMQ may require a lot of infrastructure code to be written around it. For instance, you may have a sending application sending messages to a queue and a listening application constantly listening on the queue to pick them up as and when they arrive. The listening application must be up and running, constantly waiting for messages to appear on the queue. This may turn out to be an overhead for the listening application.

MSMQ Triggers is a service that allows you to associate incoming messages in a queue with functionality in a COM component or standalone executable. The advantage of triggers is that application developers no longer need to write any infrastructure code to provide such message-handling functionality, so the problem of writing constantly listening applications would be solved.

In this article I shall discus how MSMQ triggers can be created and used in an application. This article assumes that the reader is familiar with concepts of MSMQ.

Understanding MSMQ Triggers

Triggers are associated with specific queues on a computer and are invoked every time a Message Queuing message arrives at such queues. A trigger is an automatic action taken in response to a message event. In the context of MSMQ Triggers, an event is defined as one or more conditions being satisfied with respect to a message arriving at a queue. The collection of all triggers on a particular computer is called the trigger set.

The firing of a trigger can be based on conditions. A condition is a test that is applied when a message arrives at a monitored queue. A condition is always paired with an action. An action is an executable behaviour that is taken when a condition is true. An action can be expressed as an executable and argument list; or, a COM component method, and argument list.

Each trigger can be associated with one or more rules. A rule describes an action that will be taken when a specific condition is true. The collection of all rules (for all triggers) on a particular computer is called the rule set. The relationship between Queues, triggers and rules are illustrated below:


Okay, so what happens when a message arrives on a queue for which one or more triggers are configured? All the triggers would fire simultaneously. That is, the conditions are evaluated in a sequence and when they return true the corresponding action is executed. That is, a component call happens or an executable is invoked.

So, to sum things up here; we can have multiple triggers for each queue. Each trigger can have multiple rules associated to them and hence there can be multiple actions firing when a message arrives at the queue.

Installing MSMQ Triggers

MSMQ Triggers was introduced with MSMQ 3.0. MSMQ Triggers can run on Windows 2000 with Message Queuing installed and Windows NT 4.0 with Service Pack 4 and with MSMQ 1.0 installed (Intel-based processors only). MSMQ 3.0 is bundled with Microsoft XP and hence MSMQ Triggers need not be separately installed there. MSMQ Triggers can be installed through a setup file which can be downloaded from the Microsoft site. MSMQ Triggers cannot be installed on Windows 95, on Windows 98, on dependent client computers, or on server cluster nodes. MSMQ Triggers are free for download. Click here to download MSMQ Triggers

Creating and Configuring MSMQ Triggers

Having talked about concepts of MSMQ triggers, let’s get practical. I will now show how we can create and use triggers in steps.

1. Create a Trigger

a) Select MSMQ Triggers from the Message Queuing section of the Computer Management Console

b) Right Click on the Trigger Definitions icon and select New trigger from the context menu that appears. This is illustrated below:


c) In the trigger definition screen that appears (shown below) , enter any name for the trigger and select the queue to which the trigger is associated. You can use the queue format name for the same. You can optionally use system queues. Select Serialize check box if you want your trigger to fire for messages in same order as they appeared on the queue.


2. Creating a Rule

a) Our next task is to create rules for the triggers. Right click on the Rule Definitions icon and select New rule from the context menu that appears. This is illustrated below:


b) In the rule definition screen under the general tab, enter the rule name and an optional description.


c) Enter the conditions if any in the condition tab. The conditions can only pertain to the properties of the message like contents of the label, message body etc.

d) Under the Action part, enter the action details. If the action is to call a COM component, the enter the PROG-ID of the component and the method name. Also enter the parameters that need to be passed to the method. If the action is an executable enter the full path of the executable and add parameters if required. This is illustrated below:


Note that in the above sample, I have entered the action as a COM Component with a PROGID of MSMQ.TriggerHandler. When the trigger fires and the condition is true, the Execute method of this component is invoked and the Message Label and Message Body are passed as parameters.

3. Associating a rule to a trigger

a) Having created the triggers and rule definitions, we have to associate them. Under trigger definitions, select a trigger to which a rule is to be added and select Add/Remove rules that appears in the context menu. You get a screen as shown below.


b) Now in the window that appears, select all the rules that you need to associate with this trigger. This is illustrated below:


Note that I have selected three out of the four rules for my trigger. So, we are done. We can test the functionality by pumping messages to the queue and check to see the actions firing against these messages, in our case, a COM component.

In the previous section, we created triggers using the administration console. They can also be created programmatically. Installing MSMQ Triggers installs MSMQTriggers Object library. This gives us a set of COM Components which we can use to create and manage triggers programmatically.

Limitations

Developers have to take care of certain aspects while using MSMQ Triggers:

  • When a trigger action invokes a COM component, the component runs in the process space of MSMQ Triggers (unless the component runs in a COM+ Server application). So, the developer must do proper exception handling in the component, else you might end up crashing the Triggers Service.
  • MSMQ Triggers only peek at queue messages. So, you have to take care of deleting messages from the queue once the processing is over. If messages still continue to exist in the queue, then these would be picked up and processed again when the service is restarted.

Conclusion

MSMQ Triggers value add to the development of messaging applications. MSMQ Triggers are easy to create and manage and they solve many of the problems faced while developing against MSMQ.

For more details about MSMQ Triggers, download the documentation available as a zip file at: http://www.microsoft.com/ntserver/zipdocs/msmqtriggersdoc.zip

Transactional MSMQ

Introduction

In the previous article, we saw some very basics of MSMQ programming like creating a queue, sending and receiving simple messages etc. In this article, we shall consider an important aspect of programming MSMQ: Transactional messaging. We shall start off by understanding why you need transactional messaging, what it is,  followed by some simple code snippets showing how it can be done in .NET. Finally, we shall wrap up the article considering two case studies where transactional messaging with MSMQ has been applied.

Why Transactional Messaging?

Before plunging into transactional messasing, let us consider some problems with non-transactional messaging.

Messages can be lost

By default, MSMQ stores messages in memory when they are sent, received or routed across different servers. This is done only to boost performance as persisting messages on the disk is an extra overhead. So, if the MSMQ service crashes or the machine holding the messages goes down unexpectedly, then messages are bound to get lost.

As a work around to this problem, we can set the Recoverable property of the message to True. This property can also be set at the queue level by setting the DefaultPropertiesToSend property. The  code snippet shown below indicates the same.


Collapse | Copy Code

Dim queue As New MessageQueue()
queue.Path = “.\Private$\TestQueue”
queue.DefaultPropertiesToSend.Recoverable = True

‘This method can also be used

‘Here, we use the Recoverable property of the message itself

‘Dim msg As New Message()

‘msg.Body = “My recoverable message”

‘msg.Label = “Some Label”

‘msg.Recoverable = True

‘queue.Send(msg)

queue.Send(“My recoverable message”,”Some Label”)
queue.Close()

Duplicate messages

In the above implementation, we solved the problem of messages being lost in transit. But still, this does not guarantee that the messages aren’t duplicated. It is definitely not acceptable for a reliable application to process a message twice as it is to have lost messages.

Both the above problems are successfully solved by the usage of transactional messaging. Now, you may ask me, considering the above explanation, we may always end up using transactional messaging. Now, when do we actually use non transactional messaging and why? The answer to this question is simple. If reliability is not a concern for your application, that is, if your application is not affected by lost messages or the order of arrival of messages, use non transactional messaging. Remeber that the reliability offerered by transactional messaging comes at a cost: performance.

One rough analogy that immediately comes to my mind is usage of TCP as against the usage of UDP. UDP is analogous to non transactional messaging. UDP does not ensure that the packets arrive to the destination and they do in the same order. TCP on the other hand, ensures that the packets reach the destination and they arrive in the same order as they were sent. Therefore, TCP is analogous to non transactional messaging. Likewise, the choice between TCP and UDP is purely made based on the level of reliability and performance required for the networking application.

Creating a Transactional Queue

To implement transactional messaging, you would require to create a transactional queue first. This can be done either through the computer management console snap-in or programmatically.
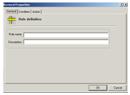
Through the snap-in


Fig 1: Creating a transactional queue

Transactional queues are created just like normal queues. We just have to check the Transactional check box as shown in Fig 1.

Programmatically

To create a transactional queue programmatically, we need to use one of the overloads of Create method of MessageQueue class which takes a boolean parameter indicating whether the queue to be created is transactional or not. We should pass True here. For eg.


Collapse | Copy Code

MessageQueue.Create(“pc-manoj\Private$\MyTranQueue”, True)

Note: The Transactional attribute of a queue cannot be changed after the queue is created.

Understanding Transactional Messaging

MSMQ supports two types of transactions: Internal and External. Let’s have a look at them one at a time.

Internal Transactions

MSMQ facilitates sending and receiving multiple messages in a transaction through the MessageQueueTransaction class. The Send and Receive methods of the MessageQueue class have overloads that accept an instance of the MessageQueueTransaction class to indicate that the operation falls under a transaction. The transaction itself can be controlled using the Begin method (which starts a transaction) , Commit and Abort methods (which commits and rollbacks the transaction respectively). Let’s consider an example to illustrate their usage:


Collapse | Copy Code

Dim mqTran As New MessageQueueTransaction()

Dim queueA As New MessageQueue()
queueA.Path = “.\Private$\TranQueueA”
Dim queueB As New MessageQueue()
queueB.Path = “.\Private$\TranQueueB”

mqTran.Begin()
Try
queueA.Send(“Message A”, “Label A”, mqTran)
queueB.Send(“Message B”, “Label B”, mqTran)
mqTran.Commit()

Catch ex As Exception
mqTran.Abort()
Finally
queueA.Close()
queueB.Close()
End Try

In the above code snippet, we are sending two messages to two different queues in the same transaction.

Many a times, you may want to query on the status of a transaction and then take some action based on the status. The MessageQueueTransaction class exposes a Status property which gives you just that. It is exposed as an enumeration whose values are described below:


Value

Description

Initialized

The transaction has been initialized but not yet started. When a MessageQueueTransaction class is just instantiated, this will be the status.

Pending

The transaction has not yet been committed or aborted. This will be the status when you begin a transaction using Begin method but not have committed or rolled back (called Commit or Abort methods).

Committed

The transaction has been committed.

Aborted

The transaction has been aborted.

Using the MessageQueueTransactionType enumeration

The Send and Receive methods of the MessageQueue class  also expose overloads which takes a parameter of type MessageQueueTransactionType which is an enumeration of certain values.  This basically specifies how you would like to interact with the queue (transactionally). We have not used it thus far, but is important to understand why and where this is used.

The enumeration contains three values:

Single

You might often come across situations where you want to have each queue operation in a separate internal transaction. That is, you may not want to use MessageQueueTransaction object to qualify each MSMQ operation. In such cases you can use the Single option. Here’s an example:


Collapse | Copy Code

Dim queueA As New MessageQueue()
queueA.Path = “.\Private$\TranQueueA”
queueA.Send(“Single internal transactional message A”, “Label A”, _
MessageQueueTransactionType.Single)
queueA.Close()

Understand that, to send a message to a transactional queue, you have to be in a transaction (internal or external), else an error will be thrown.

None

Using this option enables us to receive a message from a transactional queue, but outside a transaction. We can also use this option to send a transactional message to a non transactional queue. 

Automatic

This option is used in conjunction with external transactions. This directs the send or receive operation to use an already existing transaction context created by COM+, MTS etc. This is shown in the next section.

External Transactions

The above section dealt with doing multiple MSMQ operations within the same transaction. But, in a distributed application it is many a time required to include MSMQ operations as a part of an other transaction. For example, you may want to receive a message from a queue followed by doing some database operations; like updating a table etc. To cater to these needs, MSMQ supports DTC based transactions. Like other resource managers like Oracle and SQL Server, MSMQ can be enlisted in a distributed transaction. For example, in the below code snippet, I am doing an insert into a database table followed by a sending a message to a queue.


Collapse | Copy Code

Dim conn As New SqlConnection( _
“server=.;database=pubs;Trusted_connection=yes”)
Dim cmd As New SqlCommand( _
“Insert into Orders Values(‘OrderA’,’Manoj’)”, conn)
Dim queueA As New MessageQueue()

Try
conn.Open()
cmd.ExecuteNonQuery()

queueA.Path = “.\Private$\TranQueueA”
queueA.Send(“OrderA for Manoj”, “Order A”, _
MessageQueueTransactionType.Automatic)

ContextUtil.SetComplete()
Return True
Catch ex As Exception
ContextUtil.SetAbort()
Return False

Finally
conn.Close()
queueA.Close()
End Try

One thing to understand is that, when transactional messaging happens (internal or external), a message is not written to the queue until the transaction is committed. Likewise, if a message is received in a transaction, it is read right away, but is replaced back to the queue if the transaction aborts.

Also, be clear as to when, what type of transactional messaging should be used. External transactions are much slower that Internal transactions because of the overhead involved with respect to DTC. If you deal only MSMQ operations in your transaction, use Internal transactions as they are more efficient. Use External transactions if your transaction involves more than one resource manager like a database etc.

Case Study

Now, let’s consider two cases where transactional messaging has been used. With these examples, the idea behind transactional messaging should become crystal clear.

Purchase Order Application


Fig 2 : A Purchase Order application

Given above is a very simplified diagram of a purchase order application. The application has two parts: One which places customer orders and the other which processes it. When a customer places an order, they are not processed immediately, but are processed at a later point during the day. The order processing application processes these orders in the same order they were placed and then confirms or rejects the delivery based on some conditions. The application has been implemented using MSMQ as the transport mechanism. Every time an order is placed by the customer, a message describing the same is placed on a queue and the processing application picks up these messages and processes them later. Now here, we would need transactional messaging because we need to ensure that:

  • The placed orders are not lost.
  • The orders are processed in the same order they were placed.

Note that we can not ensure the above requirements with non-transactional messaging.

Queued Components (QC)

Queued components are a service provided by COM+ that lets you call components asynchronously. The architecture of queued components is based on transactional messaging provided by MSMQ. I will not delve in depths of QC but will just tell very briefly how QC works.

When a queued component is instantiated  by the caller, the queued component itself is not actually instantiated. Instead, a component called QC recorder is instantiated. When method calls are made on the queued component, the recorder packages all these calls into an MSMQ message and posts it to a transactional queue. A listening application picks up this message from the queue and plays the message.  By playing, I mean instantiating the actual component and then calling all the methods in the order they were made by the caller.

So, by using transactional messaging, what has been ensured here is that the queued component is definitely called (the message is not lost) and the method calls are made only once (no duplication of messages). Therefore, though the calls are asynchronous, the queued component calls are a part of a logical transaction.

Clipped on 8-November-2011, 7:23 PM from

Introduction to MSMQ

Message Queuing applications can be divided into two categories: sending applications, which send messages to queues, and receiving applications, which read messages in queues and can remove messages from queues. The following illustration shows several sending applications sending messages to a queue and several receiving applications reading the messages in the queue. (Using the directory service is not required; messages can be sent to the queue and read from the queue without accessing the directory service.)


Sending Applications

Sending applications send messages to a queue, not to the receiving application. Using a queue as the destination allows the sending application to operate independently of the receiving application.

Developers have several options to consider when designing sending applications:

  • Transactional messages versus nontransactional messages. Sending a transactional message can be included with other operations—such as updating a database or sending one or more other transactional messages—in an atomic process that can be aborted if any part of the transaction fails. Transactional messages guarantee exactly-once and in-order delivery. Conversely, nontransactional messages cannot guarantee exactly-once or in-order delivery.
  • Express delivery versus recoverability. A message may be routed through several computers before it reaches its destination. Recoverable messages can be delivered even if one of these computers crashes. This is because a copy of the message is stored locally on disk on the sending computer and on every computer that forwards the message during routing until the message is delivered to the next computer. After delivery to the destination queue, recoverable messages are stored on disk in memory-mapped files until they are received. Express messages, on the other hand, are stored only in volatile memory on the sending computer, during routing, and after delivery to the destination queue. As a result, if the computer where the message resides crashes or reboots, the message is not available when the computer restarts. Similarly, an express message delivered to a queue on a virtual server in a cluster will be lost if the virtual server fails over before the message is received.
  • Direct routing versus store-and-forward routing. Direct messages are sent directly to the computer where the destination queue resides and do not access the directory service. Store-and-forward routing requires a connection to the directory service, and the path that the message takes is determined by Message Queuing.
  • Sending messages to a single destination versus multiple destinations. Message Queuing supports both sending messages to a single destination and sending messages to multiple destinations. MSMQ 3.0 provides support for sending messages to multiple destinations in the form of distribution lists, multiple-element format names, and multicast addresses.
  • Authenticated messages versus non-authenticated messages. Authenticated messages are digitally signed and authenticated by Message Queuing. When a message is authenticated, Message Queuing guarantees that no one has tampered with the message, and it verifies the identity of the sender.
  • Encrypted messages versus non-encrypted messages. Encrypted messages are encrypted before they leave the source computer to after the time when they reach the target computer. Information in non-encrypted messages can be read while the message is on the wire.
  • Online versus offline operations. When online, the sending application has access to information stored in the directory service. When operating offline, the sending application cannot make any calls that require access to the directory service.


Receiving applications

Receiving applications read the messages in the queue in two different ways. The receiving application can peek at a message in the queue, leaving the message in the queue, or it can retrieve the message, taking the message out of the queue.

Developers should consider the following when designing their receiving applications:

  • Local versus remote read. Messages should always be read locally. Reading messages remotely consumes a lot of resources.
  • Transactional versus nontransactional messages. The retrieval of a transactional message can be combined with other operations—such as retrieving one or more other transactional messages, sending one or more other messages, or updating a database—within a single transaction that can be aborted if any action in the transaction fails.
  • Synchronous versus asynchronous reading. The asynchronous reading of messages allows the receiving operation to continue its processing while it waits for the messages to be read from the queue. The synchronous reading of messages blocks processing until the messages are read from the queue or a time-out expires.
  • Peek versus retrieve. Peeking at message allows the receiving application to look at the message and leave a copy of the message in the queue. Retrieving messages from the queue removes the messages from the queue.
  • Online versus offline operations. When online, the receiving application has access to information stored in the directory service. When operating offline, the receiving application cannot make any calls that require access to the directory service.

Simple Pipes and Filters Implementation with Fluent Interface Behavior

Background

Pipes and Filters is architectural pattern in which an event triggers a series of processing steps on a component, transforming it uniquely on each step. Each step is a called a filter component and the entire sequence of called the pipeline. The filter components take a message as input, do some sort of transformation on it and then send it to the next filter component for further processing. The most common implementations of a pipe and filter architecture are Unix programs where the output of one program can be linked to the output of another program, processing XML via a series of XSLT transformations, compilers (lexical analysis, parsing, semantic analysis, optomization and source code generation) and many, many other uses (think ASP.NET Http stack).


 Pipe and Filters Conceptual

The diagram above depicts the actors and message flow. The pump is the event originator which pushes messages into the pipeline to be processed by the individual filter components. The messages flow through the pipeline and become inputs for each filter component. Each filter performs it’s processing/transformation/whatever on the message and then pushes the message back into the pipeline for further processing on the next filter component. The sink is the destination of the message after it has been processed by each filter component.

Pipe and Filters Implemented

For me, the best way for me to implement a design pattern is to see how others have implemented it. A quick google search and I came up with the two good examples (actually there are many, many, many examples!):

Both examples take advantage of the newer features of C# such as the Yield keyword (the purpose behind their posts?), which did not apply exactly to my needs. A little meddling however, and I came up with the following:


Simple Pipe and Filters Implementation

Here is the final code for the FilterBase<T>:


And the code for the Pipeline<T> class:


Here is rather weak unit test illustrating the usage.


Note that I added a fluent-interface type behavior to the Pipeline<T> class so that you can chain together the registration of the filters and finally execute the chain.


as

as


The as operator is used to perform conversions between compatible types. The as operator is used in an expression of the form:

expression as type

where:

expression

An expression of a reference type.

type

A reference type.

Remarks

The as operator is like a cast except that it yields null on conversion failure instead of raising an exception. More formally, an expression of the form:

expression as type

is equivalent to:

expression is type ? (type)expression : (type)null

except that expression is evaluated only once.

Note that the as operator only performs reference conversions and boxing conversions. The as operator cannot perform other conversions, such as user-defined conversions, which should instead be performed using cast expressions.

Example

// cs_keyword_as.cs
// The as operator
using System;
class MyClass1
{
}

class MyClass2
{
}

public class IsTest
{
public static void Main()
{
object [] myObjects = new object[6];
myObjects[0] = new MyClass1();
myObjects[1] = new MyClass2();
myObjects[2] = “hello”;
myObjects[3] = 123;
myObjects[4] = 123.4;
myObjects[5] = null;

for (int i=0; i<myObjects.Length; ++i)
{
string s = myObjects[i] as string;
Console.Write (“{0}:”, i);
if (s != null)
Console.WriteLine ( “‘” + s + “‘” );
else
Console.WriteLine ( “not a string” );
}
}
}

Output

0:not a string
1:not a string
2:’hello’
3:not a string
4:not a string
5:not a string

Action(Of T) Delegate

Action(Of T) Delegate

.NET Framework 4


Encapsulates a method that has a single parameter and does not return a value.

Namespace:  System

Assembly:  mscorlib (in mscorlib.dll)

Syntax


C#

C++

F#

VB

public
delegate
void Action<in T>(
        T obj
)

Type Parameters

In T

The type of the parameter of the method that this delegate encapsulates.

This type parameter is contravariant. That is, you can use either the type you specified or any type that is less derived. For more information about covariance and contravariance, see Covariance and Contravariance in Generics.

Parameters

obj

Type: T

The parameter of the method that this delegate encapsulates.

Remarks


You can use the Action(Of T) delegate to pass a method as a parameter without explicitly declaring a custom delegate. The encapsulated method must correspond to the method signature that is defined by this delegate. This means that the encapsulated method must have one parameter that is passed to it by value, and it must not return a value. (In C#, the method must return void. In Visual Basic, it must be defined by the Sub…End Sub construct. It can also be a method that returns a value that is ignored.) Typically, such a method is used to perform an operation.

Note

To reference a method that has one parameter and returns a value, use the generic Func(Of T, TResult) delegate instead.

When you use the Action(Of T) delegate, you do not have to explicitly define a delegate that encapsulates a method with a single parameter. For example, the following code explicitly declares a delegate named DisplayMessage and assigns a reference to either the WriteLine method or the ShowWindowsMessage method to its delegate instance.

C#

VB


using System;
using System.Windows.Forms;

delegate
void DisplayMessage(string message);

public
class TestCustomDelegate
{
public
static
void Main()
{
DisplayMessage messageTarget;

if (Environment.GetCommandLineArgs().Length > 1)
messageTarget = ShowWindowsMessage;
else
messageTarget = Console.WriteLine;

messageTarget(“Hello, World!”);
}

private
static
void ShowWindowsMessage(string message)
{
MessageBox.Show(message);
}
}

The following example simplifies this code by instantiating the Action(Of T) delegate instead of explicitly defining a new delegate and assigning a named method to it.

C#

VB


using System;
using System.Windows.Forms;

public
class TestAction1
{
public
static
void Main()
{
Action<
string> messageTarget;

if (Environment.GetCommandLineArgs().Length > 1)
messageTarget = ShowWindowsMessage;
else
messageTarget = Console.WriteLine;

messageTarget(“Hello, World!”);
}

private
static
void ShowWindowsMessage(string message)
{
MessageBox.Show(message);
}
}

You can also use the Action(Of T) delegate with anonymous methods in C#, as the following example illustrates. (For an introduction to anonymous methods, see Anonymous Methods (C# Programming Guide).)

C#


using System;
using System.Windows.Forms;

public
class TestAnonMethod
{
public
static
void Main()
{
Action<
string> messageTarget;

if (Environment.GetCommandLineArgs().Length > 1)
messageTarget =
delegate(string s) { ShowWindowsMessage(s); };
else
messageTarget =
delegate(string s) { Console.WriteLine(s); };

messageTarget(“Hello, World!”);
}

private
static
void ShowWindowsMessage(string message)
{
MessageBox.Show(message);
}
}

You can also assign a lambda expression to an Action(Of T) delegate instance, as the following example illustrates. (For an introduction to lambda expressions, see Lambda Expressions (C# Programming Guide).)

C#

VB


using System;
using System.Windows.Forms;

public
class TestLambdaExpression
{
public
static
void Main()
{
Action<
string> messageTarget;

if (Environment.GetCommandLineArgs().Length > 1)
messageTarget = s => ShowWindowsMessage(s);
else
messageTarget = s => Console.WriteLine(s);

messageTarget(“Hello, World!”);
}

private
static
void ShowWindowsMessage(string message)
{
MessageBox.Show(message);
}
}

The ForEach and ForEach(Of T) methods each take an Action(Of T) delegate as a parameter. The method encapsulated by the delegate allows you to perform an action on each element in the array or list. The example uses the ForEach method to provide an illustration.

Examples


The following example demonstrates the use of the Action(Of T) delegate to print the contents of a List(Of T) object. In this example, the Print method is used to display the contents of the list to the console. In addition, the C# example also demonstrates the use of anonymous methods to display the contents to the console. Note that the example does not explicitly declare an Action(Of T) variable. Instead, it passes a reference to a method that takes a single parameter and that does not return a value to the List(Of T).ForEach method, whose single parameter is an Action(Of T) delegate. Similarly, in the C# example, an Action(Of T) delegate is not explicitly instantiated because the signature of the anonymous method matches the signature of the Action(Of T) delegate that is expected by the List(Of T).ForEach method.

C#

VB


using System;
using System.Collections.Generic;

class Program
{
static
void Main()
{
List<String> names =
new List<String>();
names.Add(
“Bruce”);
names.Add(
“Alfred”);
names.Add(
“Tim”);
names.Add(
“Richard”);

// Display the contents of the list using the Print method.
names.ForEach(Print);

// The following demonstrates the anonymous method feature of C#
// to display the contents of the list to the console.
names.ForEach(
delegate(String name)
{
Console.WriteLine(name);
});
}

private
static
void Print(string s)
{
Console.WriteLine(s);
}
}
/* This code will produce output similar to the following:
* Bruce
* Alfred
* Tim
* Richard
* Bruce
* Alfred
* Tim
* Richard
*/

default Keyword in Generic Code (C# Programming Guide)

default Keyword in Generic Code (C# Programming Guide)


In generic classes and methods, one issue that arises is how to assign a default value to a parameterized type T when you do not know the following in advance:

  • Whether T will be a reference type or a value type.
  • If T is a value type, whether it will be a numeric value or a struct.

Given a variable t of a parameterized type T, the statement t = null is only valid if T is a reference type and t = 0 will only work for numeric value types but not for structs. The solution is to use the default keyword, which will return null for reference types and zero for numeric value types. For structs, it will return each member of the struct initialized to zero or null depending on whether they are value or reference types. The following example from the GenericList<T> class shows how to use the default keyword. For more information, see Generics Overview.

C#

public
class GenericList<T>
{
private
class Node
{
//…

public Node Next;
public T Data;
}

private Node head;

//…

public T GetNext()
{
T temp =
default(T);

Node current = head;
if (current != null)
{
temp = current.Data;
current = current.Next;
}
return temp;
}
}